The Situation: I wanted to create a structure for my mother’s clematis to climb. We finally had some clematis survive our harsh Alberta winters, and in 2021 we were looking forward to seeing their blossoms bring much-needed colour to the yard.
The Challenge: Our yard is small, and our fences are required to be grey. I wanted a focus point that could break up the monotony of the grey fence with warmer colour in all seasons. I also wanted the trellis to continue in the style of a screen I previously built on the patio without it being too repetitive.
Before: Our small yard faces south, which provides wonderful sunshine throughout the day. The grey fence provides a neutral background for the lush greens of the plants in the summer, but winters in Alberta are long and that grey is bleak to look at all year long.

Having a permanent structure not only supports the growth of vines, it can provide interest and colour in the winter. Not to mention the additional perching space for birds and places to hang garden art!
After: We now have an attractive trellis 3-4 clematis can grab hold and climb.
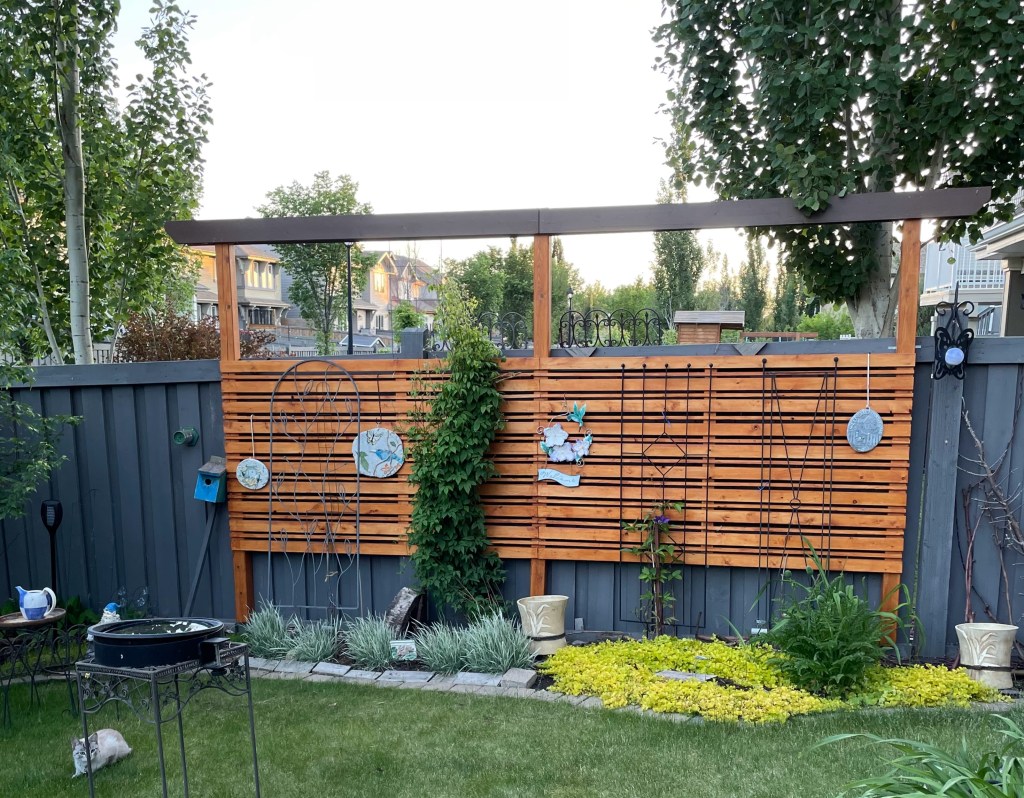
How I did it:
- Determine the centre point, and where the outer edges would be. I ended up making it bigger than originally planned which allowed me to use the existing fence posts for additional anchoring
- Stained three(3) 4×4 cedar posts. Installed using L-brackets to attach upright posts to the fence
- Rip 1 x 6 spruce boards in half lengthwise to length desired, then stain in desired colour
- Cut ends of four (4) 2 x 6 cedar boards for top lintels, then painted in deep brown exterior paint
- Cut 1 x 1 hemlock to length desired, then stain in desired colour
- Starting at the bottom, install boards alternating between thick and thin. I used another board as a spacer so the spacing would be as uniform as possible. I used a nail gun to attach the boards to the posts. Continue until desired height is reached.

Key Lessons Learned:
1. I love using cedar in the yard, though it is more expensive. So, I saved some money by using cedar for the posts and lintels (cross pieces) and spruce for the grid. I ripped 1 x 6 spruce in half lengthwise on my table saw for the thicker strips and used 1 x 1 hemlock for the thin strips. Staining each piece was time-consuming, but several coats will deepen the colour and ensure it lasts several years.
2. I typically begin with a basic sketch, but the specifics often evolve as the project progresses. Things are not always level or plumb, and it is essential to adjust as you go. Our yard slopes both to the south and the west. A perfectly level structure won’t appear level due to the sloping fence line behind it. So don’t be surprised if you have to find a balanced “level” between true level and what looks right optically.
3. Finding straight and true wood is also tricky. The boards needed to be straight and not bowed or twisted, or it would be hard to align the pieces. Using a scrap of wood as a spacer saved a lot of time and helped hold pieces reasonably level while I double-checked and grabbed my nail gun.
4. With thin pieces of wood, using screws can cause the delicate pieces to split or chip. To prevent this you can drill a small pilot hole, then carefully screw them in. A brad nailer will do the job, but it is awkward and the pieces get loose due to expansion and contraction of the wood, so some pieces are not very secure. I recommend avoiding the use of such small, thin pieces unless they can be attached in front or behind the posts or mortise or other joint method.
3. We liked how this looked so much, I built a couple more smaller screens to hide cluttered areas around our shed and my mom’s potting bench. She loves hanging her “treasures” from the slats and they provide design continuity around the yard.

Conclusion
Adding a structure like a trellis or screen to your yard adds interest, colour, and space for plants and birds to hang, perch or climb. We love how this turned out and hope you like it too!

Leave a comment